


Thumbnail of web page in C# Net
Techniques
This category is aimed to help programmers in order to find and share helpfull techniques, source code and more stuff.
Techniques / Web tools : WebPage Thumbnail with DypsWebCapture and C#

Documentation: DypsWebCapture object reference <<
- Using DypsWeb Capture COM component in ASP.NET : create a thumbnail snapshot of a web page on the fly
Here is the final result :

This short example will help you to learn how to create a thumbnail snapshot of a web page on the fly with DypsWebCapture from an ASP.NET page.
You should have write permission on the local folder.
The basic problem lies in the fact that ASP.NET is based on the Common Language Runtime, a so called Managed Execution Environment. The code itself then is called Managed Code and the Runtime obtains the information for management of the code out of the Metadata which was generated by the compiler for the description of the source code.
The problem now is that existing components do not have Metadata information. Therefore, I have to generate the Metadata for them - but stop: if there is a tool capable of generating Metadata, where does that tool take the information for the Metadata from? This comes out of the Type Library and nowadays all components have a Type Library. If not, there is a (crufty) workaround for this, but I'd rather weld a handle onto the component - chuck it!
In this article, I will demonstrate the generation of Metadata using the DypsWebCapture component as an example. Who wants to follow through the examples can download the demo version without problems .
The download link can be found at the end of the article is here : download DypsWebCapture
The use of the source code in this article requires an installation of Microsoft's .NET Framework SDK on a Web server.
I also assume a certain familiarity of the reader with the C# programming language.
- Creating the Metadata DLL
The first step is to create the Metadata.
For this we first have to change into the directory of the component DLL in question:
In this directory we start a command prompt and enter the following command:
tlbimp DypsWebCapture.dll /out:DypsWebCapture_dotnetproxy.dllWith this simple command, the Metadata information is saved to the file DypsWebCapture_dotnetproxy.dll (strictly speaking, this DLL is an Assembly).
This now is our Proxy for the actual 'unmanaged' COM object. Here is the output for the generation of the proxy for DypsWebCapture :

- Installation for ASP.NET
For ASP.NET there are a few ways of installing the Metadata DLL:
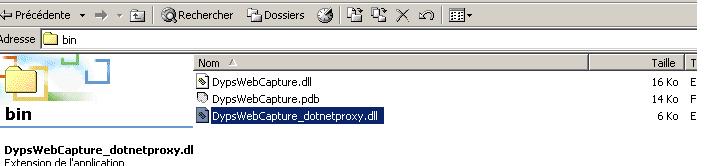
* Into the bin directory of the application
* Into the directory of the ASP.NET file
The method of saving the file next to the ASP.NET file has a catch: you have to insert an @Assembly statement into every ASP.NET page that shall use the component. Saving to the bin directory you avoid that - the assembly will be loaded for all ASP.NET pages of the application.
Therefore I of course put the assembly in the bin directory:
- The IL Disassembler
Now we come to something that will at first terrify many VB or VBScript programmers - we will have to use a disassembler to get at some important information:
- The Namespace of the Assembly (for the @Import Statement)
- The precise names of the classes (these might be very well different from those used in ASP!)
- The data types of methods and properties
- The precise spelling of the methods and properties - in C# it does matter whether you write Bodytext or BodyText.
The IL (Intermediate Language) Disassembler can started with the ildasm.exe command entered in the Run dialogbox (accessible via the start menu).
The Open command (file menu) selects the respective DLL and in our case we get the following picture:
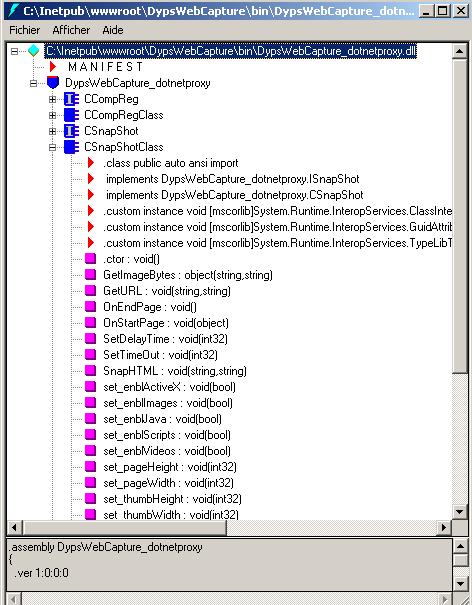
Notice the Namespace: DypsWebCapture_dotnetproxy.
We need this for the @Import statement in our ASP.NET pages. Furtheron there are some nice icons hidden here - a hint: for ASP.NET programmers only the completely blue symbols are important - these are the classes. The one of interest to us is CSnapShotClass.
This is equivalent to the ProgId DypsWebCapture.Snapshot. As already said, there can be differences in naming!
As we have expand this class, we obtain a list of properties and methods.
As we see, all of the methods have perfectly unequivocal data type assignments: first comes the name of the method, then a colon followed by the return value and then in brackets the parameters of the method.
For VBScript programmers things become unfamiliar when we come to the properties which are represented by get_ and set_ methods:
However there is a listing according to property names (red rhomb). When double clicking a property, we get shown the definition of that property. Attention: properties may be Get, Set or Get/Set.
Take your time toying around with the IL Disassembler - it will certainly come in handy from time to time!
- Use of the component in ASP.NET
As we now are well informed about the Metadata, all that remains for us is to actually use the component in ASP.NET. The following example (sasmtpmail.aspx) proves that once all prerequisites have been met, programming is not really difficult any longer:
<% @Page Language="C#" %>
<% @Import Namespace="DypsWebCapture_dotnetproxy" %>
<%
 // Tested with DypsWeb Capture

 CSnapShotClass Snap = new CSnapShotClass();
 Snap.thumbWidth = 200;
 Snap.thumbHeight = 150;

byte[] bytes=(byte[])Snap.GetImageBytes("http://www.yahoo.com",
 "C:\\Inetpub\\wwwroot\\DypsWebCapture\\test.png");

 Response.ContentType = "image/png";
 Response.BinaryWrite( (byte[]) bytes );
%>
First the Namespace DypsWebCapture is imported, followed by the creation of an instance of the class CSnapShotClass. In ASP we would have created the component with this statement:
Set Snap = CreateObject("DypsWebCapture.Snapshot")
The remaining source code isn't different (except for C# vs VBScript) from that of a normal ASP page in which DypsWebCapture is being used.